
OpenGL 4: A Fresh Coat Of Paint
As colourful as our cube looks it’s not going doing a good job of pretending to be a crate or a book or anything really. Making something look convincing starts by giving it the right appearance which we do with textures. Textures are specific ways of collecting types of images with some key features that OpenGL is interested in. We’ll be starting with the most common type called GL_TEXTURE_2D but there are many more to explore.
Textures are used for a lot more than just supplying images to cubes. We’ll take a brief look at some of the other uses for them as well.
As usual here’s what we’re working towards:
Source Material
Before we dive into the details we need a texture to display. For this I’ll be using a beautiful image of wooden planks tastefully distressed by years of being used for examples. You can grab this and many many more from the wonderful Polyhaven.
Head over to Distressed Planks to see a preview of our texture. You’ll want to change the resolution to 1K to keep file sizes reasonable. Expand the download menu and pick Diffuse - PNG to only grab the image we need.
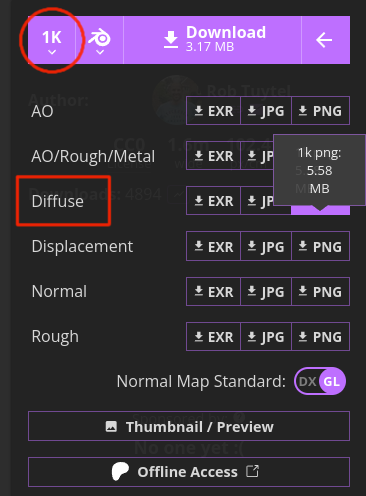
Save the image in the same place your Program.cs file is to make loading it straightforwards.
Learning To Read
The tradditional approach to reading images in dotNet was to use System.Drawing but as the big red warning box suggests this has some serious limitations. If you’re on Windows and can comply with these requirements then System.Drawing is not a terrible first choice. For our project we’re going to avoid it as the whole purpose of OpenGL is to be multi-platform!
If we can’t use the built in libraries what choices do we have? We’re going to pick a fairly popular library in the graphics world that’s part of the stb family of single purpose libraries: stb_image. If you’re panicking thinking how do we include C libraries in our project, isn’t that a lot of work, you’re in luck. These libraries have been automatically translated into C# and are available via NuGet just like every other package!
We’ll start by adding the StbImageSharp NuGet Package:
dotnet add package StbImageSharp --version 2.30.15
With that added we’re going to be brave and make a new class called Texture and put it in Texture.cs as expected:
class Texture
{
}
At the top we can throw down all the using we’ll need to load a texture in:
using OpenTK.Graphics.OpenGL;
using StbImageSharp;
Everything is ready to go so we can finally start the interesting part and load in some data.
A Handle On Things
Like we did with our Shader class we’ll be avoiding the constructor for now and instead start off with a Buffer method. This method will take a Stream hopefully containing the image data and return the width and height for us:
public (int width, int height) Buffer(Stream stream)
{
    return (0, 0);
}
We’re not going to hold on to our image data any longer than needed. Before we read it in we’re going to set up the final destination over on the GPU. To do this we create a new type of OpenGL object unsurprisingly called a Texture with GenTexture(). We’re going to need this later on so like with the shader add a field to hold on to it:
class Texture
{
    int handle;

    public (int width, int height) Buffer(Stream stream)
    {
        handle = GL.GenTexture();

        return (0, 0);
    }
}
Like we do with VBOs we need to tell OpenGL that all the texture work we’re about to do should target this texture. We do this by binding the handle against the TextureTarget. This pattern of generating a handle; binding the handle to a target then performing work on the target is a core design of OpenGL. It’s something you’ll see being used in many more areas so don’t forget it.
handle = GL.GenTexture();
GL.BindTexture(TextureTarget.Texture2d, handle);
Streamin'
With Stb coming from C everything turns up in C# as static methods on a handful of classes. This should feel a little familiar to you as it’s the same style seen in OpenTK 5. We’re going to start with the ImageResult class as that’s what we want to obtain and on it we’ll find the helpfully named FromStream method:
ImageResult image = ImageResult.FromStream(stream, ColorComponents.RedGreenBlueAlpha);

// more code to come

return (image.Width, image.Height);
We had to provide a ColorComponents to Stb what is that all about? Images are made up of multiple channels of data, you’ve heard of “Red”, “Green” and “Blue” before I’m sure and those represent how much of their namesake is present in each pixel. The final value “Alpha” represents how transparent a pixel should be. We won’t be dealing with transparency during these tutorials as it’s surprisingly complicated so for now accept that images are typically made up of 4 channels and not 3.
Finally we’re returning a value tuple here using the very nice C# syntax for it. As we don’t keep the image around to find out these values later it’s helpful to record them now.
It's An Image Tex
With OpenGL set up and ready to receive our loaded image we can make it all happen with TexImage2D:
// more code is now
GL.TexImage2D(TextureTarget.Texture2d, 0, InternalFormat.Rgba, image.Width,
    image.Height, 0, PixelFormat.Rgba, PixelType.UnsignedByte, image.Data);
That is a lot of parameters! We’ve already seen TextureTarget and we need to make sure we’re sending data to the same target we bound to before. The level is for the Mip Maps which start at 0 and go up. Next is the InternalFormat which specifies the Image Format used to store the image data on the GPU. As you can probably guess by the number of options on InternalFormat there’s a lot of choice here as handling textures is a major feature of OpenGL. After this are width and height which are, you guessed it, the size of the texture being created. Until we call TexImage2D the texture exists on the gpu with a size of 0,0 which can lead to some interesting bugs.
The border argument is a holdover from the pre-core OpenGL pipeline and must always be 0. It’s a bit weird to still need to supply it but that’s what happens when your API stretches back almost 30 years!
At the end are 3 arguments that all cover the data we’re sending over. The first is PixelFormat which describes how many channels the image has and what they are. We asked Stb for RGBA so we need to match that here with Rgba. This should match the InternalFormat for now - when you know what the rules are you can break them. Next is the data type of the image which we can see on the image.Data property as byte[] so that’s UnsignedByte in GL terms. Finally the image data we’ve gone to great lengths to prepare.
The default texture filter mode, which I have not mentioned so don’t panic, requires the texture to have Mip Maps. We can either switch the filter mode or generate them. Thankfully OpenGL has a function to generate them for us so we’ll use that for now. Add this after the TexImage2D line to make it happen.
GL.GenerateMipmap(TextureTarget.Texture2d);
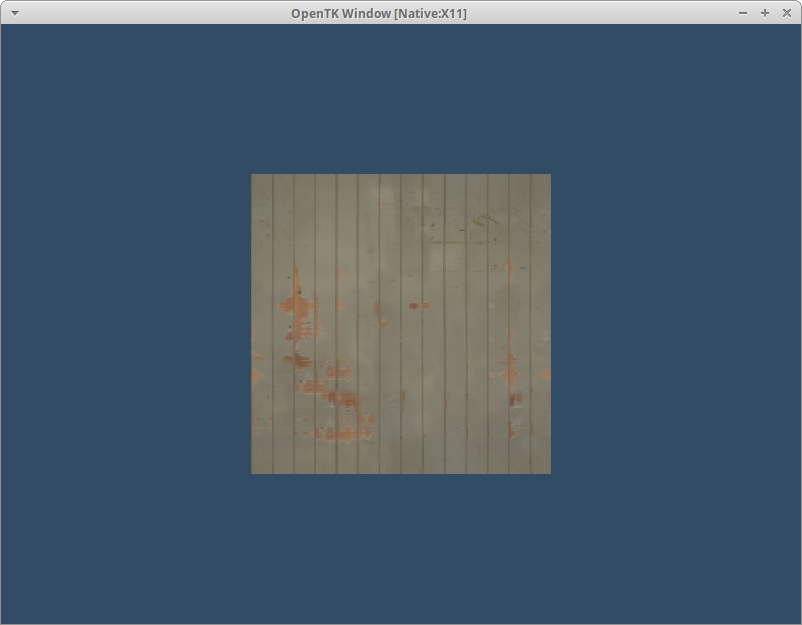
With all this done when we run our project the image will be sent to the GPU but we can’t see it yet! If you’ve gone through Chapter 1.5 and have RenderDoc installed you can fish it out of the Resources tab. Otherwise you’ll just have to trust me as we move on to reading it back out.
Bask In UV Radiation
When we created our verticies we were providing 3 values to operate in three dimensional space. For the texture we’re using it only contains two dimensions so it follows that we need to provide 2 values. These values are known as UV Coordinates and range from 0 to 1 across two dimensions: u and v. A frequent question is why not use x and y - we're already using those for our vertex position and this is an effort to keep things clear. Whenever you hear UV you'll know someone is talking about texturing.
Now that’s settled we can work out what UV coordinates our existing Verticies deserve. UV starts at 0,0 in the bottom left and goes to 1,1 in the top right no matter what size or shape the image is. We want to map the entire texture onto each face of our cube so the four corners will be [(0, 0), (0, 1), (1, 0), (1,1)]. It doesn’t matter what orientation our triangle is in it’ll still get the texture data the same way. To save you a lot of hard work deciphering them all by hand here’s the complete set:
Vector2[] uvCoords = [
    (0.0f, 0.0f), (1.0f, 0.0f), (1.0f, 1.0f),
    (1.0f, 1.0f), (0.0f, 1.0f), (0.0f, 0.0f),
    (0.0f, 0.0f), (1.0f, 0.0f), (1.0f, 1.0f),
    (1.0f, 1.0f), (0.0f, 1.0f), (0.0f, 0.0f),
    (1.0f, 0.0f), (1.0f, 1.0f), (0.0f, 1.0f),
    (0.0f, 1.0f), (0.0f, 0.0f), (1.0f, 0.0f),
    (1.0f, 0.0f), (1.0f, 1.0f), (0.0f, 1.0f),
    (0.0f, 1.0f), (0.0f, 0.0f), (1.0f, 0.0f),
    (0.0f, 1.0f), (1.0f, 1.0f), (1.0f, 0.0f),
    (1.0f, 0.0f), (0.0f, 0.0f), (0.0f, 1.0f),
    (0.0f, 1.0f), (1.0f, 1.0f), (1.0f, 0.0f),
    (1.0f, 0.0f), (0.0f, 0.0f), (0.0f, 1.0f),
];
These are some great UVs but they’re not doing us a lot of good just sitting there we need to send them to the GPU. We could create a new buffer object and line it up the same way we did for our vertex data. You know everything to do this now so why not give it a go? As is often the case with graphics programming we need to consider the performance of our code and a single buffer tends to win out here.
In order to send a single array we need to combine our existing verticies array with this new uvCoords array. This is what array packing is all about and it’s quite straightforwards. We need a destination array float[] data that’s big enough to fit everything in: new float[verticies.Length * 5]. Once created we can then loop over the data and put everything in place:
// setup code
float[] data = new float[verticies.Length * 5];

int i = 0;
for(int d = 0; d < data.Length; d+= 5)
{
    data[d + 0] = verticies[i].X;
    data[d + 1] = verticies[i].Y;
    data[d + 2] = verticies[i].Z;

    data[d + 3] = uvCoords[i].X;
    data[d + 4] = uvCoords[i].Y;
    i++;
}
Learning to pack your own buffers is an essential skill as you’ll frequently find this data comes separately. It’s not too tricky a task and with a bit of practice you’ll have no trouble thinking of ways to stuff it all in. Try building it with stridebuilder. With our new data packed and ready to go we need to update the values going into the vbo. We also need to adjust our stride to cover the extra values. Starting off our original position attribute now looks like:
uint position = (uint)GL.GetAttribLocation(shader.Id, "position");
GL.EnableVertexAttribArray(position);
GL.VertexAttribPointer(position, 3, VertexAttribPointerType.Float, false, sizeof(float) * 5, 0);
We’re going to do the same thing again but for a uv attribute we haven’t yet added. The size drops to 2 to match our expected vec2. We’re keeping the same stride as we need to skip over the same amount of data each time. Finally we now need to provide an offset as our uv data doesn’t start at the begining. There are 3 float values ahead of us so that provides our offset sizeof(float) * 3:
uint uv = (uint)GL.GetAttribLocation(shader.Id, "uv");
GL.EnableVertexAttribArray(uv);
GL.VertexAttribPointer(uv, 2, VertexAttribPointerType.Float, false, sizeof(float) * 5, sizeof(float) * 3);
Visualizing Data
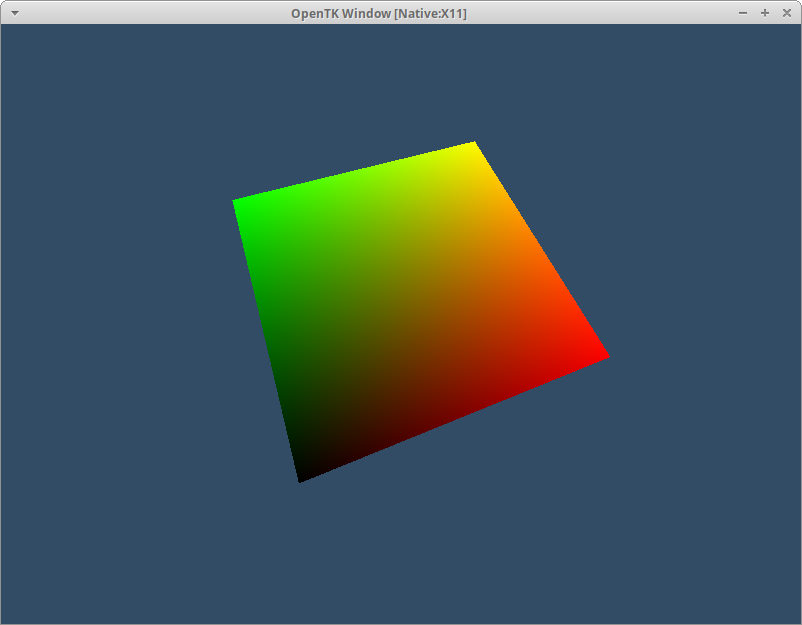
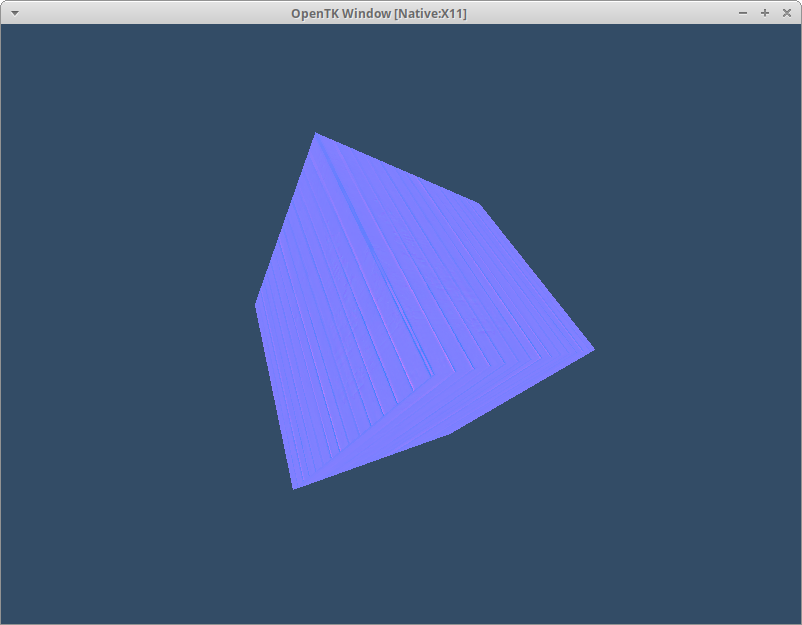
Before we finish our work and view our entire texture I want to briefly show a helpful trick. We can use any data to drive OpenGL not just what would be used conventionally. To this end we’re going to visualize our UV data on our cube.
As you probably guessed from the previous section we’re adding a new input to our vertex shader: in vec2 uv. We don’t need this directly in the vertex stage so we also create an output and hand over the data. The big advantage of doing this is the automatic interoplation of values across the fragments that make up the full vertex. At the same time we’re going to ditch the existing color output:
#version 330

in vec3 position;
in vec2 uv;

out vec2 uvcoord;
uniform mat4 rotation;
uniform mat4 projection;

void main ()
{
    uvcoord = uv;
    gl_Position = vec4(position, 1.0) * rotation * projection;
}
On the fragment side we can pick up this input and assign it to the fragColor. Don’t forget we’ve dropped from a vec3 to a vec2 so we must provide the extra value to fill out our vec4. It’s typical when visualising UV to use red & green so that’s what we’ll do:
#version 330

in vec2 uvcoord;

out vec4 fragColor;

void main ()
{
    fragColor = vec4(uvcoord, 0.0, 1.0);
}
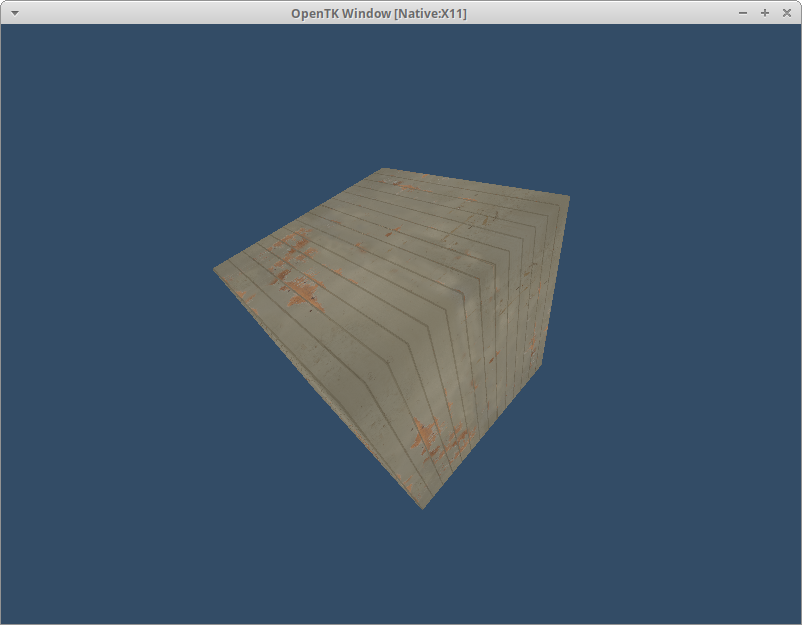
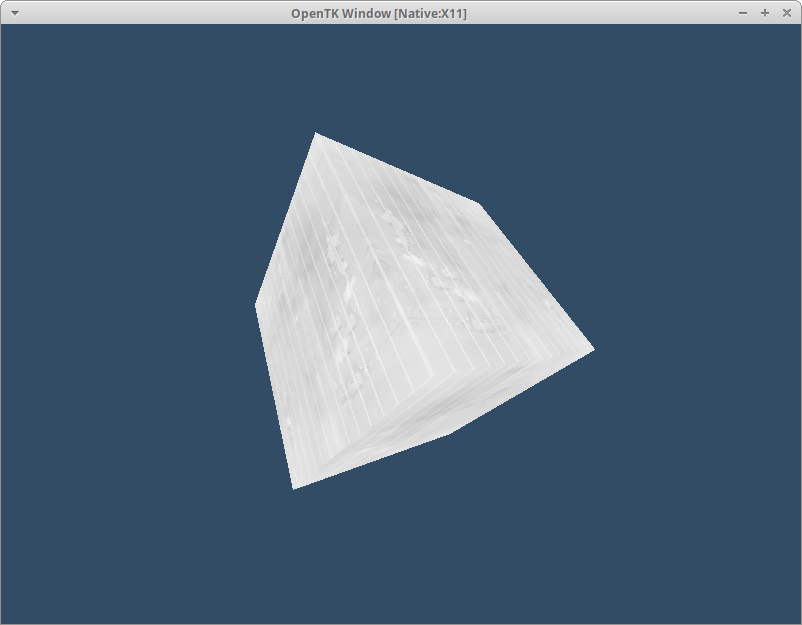
If everything goes right you should have a slightly more tropical looking cube.
Sample Robbery
With everything in place, make sure you went through the previous section to visualize the uv we’ll need that now, we are finally ready to put the texture on the cube.
With the work already done to feed our uv coords to the fragment stage we just need to get the texture in there somehow. We do this with a GLSL feature called a Sampler. These come in a variety of types to match the variety of texture types. In our case we’ve got a 2D texture so we want a sampler2D.
Just adding a sampler2D tex; to our fragment shader spits out an error “OpenGL requires sampler variables to be explicitly declared as uniform” so we better do that! Declare the sampler as uniform sampler2D tex; and we can get to using it.
Like most things in OpenGL the tex variable in our fragment shader isn’t the texture data itself but a handle that we can use with various built-in functions. The one we’re after is the texture function, also why our sampler is called tex, which takes some form of sampler and an appropriately sized position. We’re using a sampler2D so the variant we use wants vec2 - thankfully exactly what we have in uvcoord. Replace the fragColor assignment with this new function call:
#version 330

in vec2 uvcoord;
uniform sampler2D tex;
out vec4 fragColor;

void main ()
{
    fragColor = texture(tex, uvcoord);
}
There’s a small problem with our texture that I admit is quite difficult to see in this example. It’s upside down! The default behaviour of StbImage is to create images with the origin in the top left but as we’ve seen OpenGL expects the origin to be the bottom left. Thankfully there’s a quick fix for this with the helpfully named stbi_set_flip_vertically_on_load. We can add this before creating the ImageResult:
StbImage.stbi_set_flip_vertically_on_load(1);
ImageResult image = ImageResult.FromStream(stream, ColorComponents.RedGreenBlueAlpha);
All This And More
As promised we’re going to take a brief tour of other uses for textures. You won’t see any new code in here but I’ll be name dropping the techniques for you to look up.
The first two up are different uses for textures on triangles just like our current texture. First we have data for a lighting system that provides specular values hence the name Specular Map or spec map. This is a greyscale image as there’s only a single channel being used.
Second is another type of data used by lighting systems called a Normal Map or sometimes bump map. Normal maps encode the direction of the normal vector at each point.
Frequently you’ll see these maps combined where the a channel of the normal map texture contains the specular map values. Just because it’s called an alpha channel doesn’t mean we have to put alpha data in it!
Next up is a texture we’re already using. This is the Depth Texture attached to the existing framebuffer - that’s the target we render to when we call DrawArrays.

Depth values are mostly written to automatically by OpenGL and are used by things like the Depth Test we enabled before. Some advanced tricks like fogging or depth of field read this value too. The value here is a bit more complex but it’s roughly 0-1 where 0 is the near plane and 1 is the far plane.
Textures aren’t limited to just 2 dimensions. If you’re working with text a common approach is to use a Texture2DArray texture where each slice in the array contains a character bitmap.
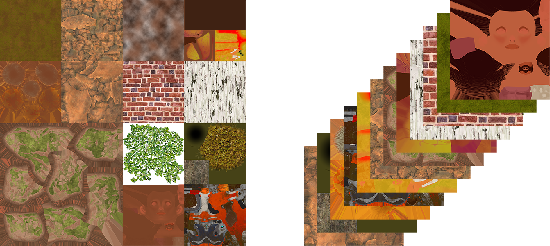
Image from Evergine - Textures
Finally there’s the fully 3 dimensional Texture3D which can be used to do things like colour grading with Look Up Tables.
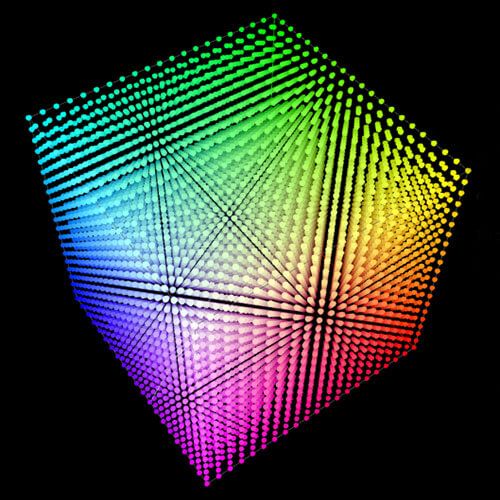
Image from Erik K Swanson - What is a LUT.
Recap
With our fully textured cube spinning away we’ve covered the fundamentals of OpenGL. Combining all the things we’ve looked at so far is enough to create a complete simple renderer.
Textures themselves are a lot more capable than just providing an image to triangles. They can provide other data to triangles like specular or normal maps and; collect ouput data and sampling it with frame buffers plus many more! It’s important to not think of a texture as just an image but as a collection of values that can be sampled in various ways.
If you made it this far you’re well on the way to becoming a graphics programmer. You could even say you’ve become one already! Don’t worry if you find yourself coming back to these chapters to refresh after a while; there’s a lot of concepts in here and it takes time for them to stick.
Continue with Chapter 5: Hands On
Originally published on 2025/04/26