
OpenGL 0: Begining OpenTK 5
So you’ve decided to get into graphics and/or game development and need to learn how OpenGL works. As you already know C# fairly well you’ve picked OpenTK but don’t know how to get started.
If you don’t already have a solid grasp of C# and general programming then you’re going to want to head over to Microsoft Learn. We’re not going to be covering any of the basics here - you’ll need to be familiar with things like loops, classes and file I/O but you don’t need to be familiar with unsafe or pointers as we won’t be using them. In keeping with most C# developers we’ll be using Visual Studio or Visual Studio Code to manage our code both of which have free versions. Once you’re comfortable making a console app and get it running with the debugger attached you’ll be ready to continue.
We’re going to cover the basics of OpenTK 5 which at the time of writing isn’t quite finished. If you’ve used OpenTK 4 there’s quite a big difference between the versions which I’ll mention where appropriate. OpenTK provides more than just a wrapper around OpenGL: there’s OpenAL for audio, a substantial Math library and, windowing and input handling.
Alongside OpenTK 5 we will be using OpenGL 3.3 also known as the modern pipeline. The legacy or fixed pipeline of OpenGL 1.1 was introduced in 1997! If you’re interested in the history of graphics hardware 1.1 and 2.0 are worth reading about. We’ll be sticking with 3.3 from 2010 which introduced the modern or programmable pipeline. Don’t worry if none of this makes sense just know 3.3 is the magic version.
The goal of this series of tutorials is to build enough confidence with OpenTK and OpenGL that you can read through the many C++ examples and tutorials and fully understand them. By the end you’ll have no trouble reading SIGGRAPH papers and implementing them on your own. We’ll start with the basics in this intro to get a window open and then work our way up from a single triangle to a complete, abit bare-bones, realtime renderer.
You’ll need a lot more than this to build a game, which OpenTK and .net provide, and you’ll be ready to take on that challenge by the end. If you’re here just looking for a way to show graphics on screen and don’t want to deal with all this code you might be better off getting started with an existing engine such as Godot or frameworks like MonoGame.
With all that out of the way and hopefully everyone on the same page we’re ready to begin at the end!
A Complete Example
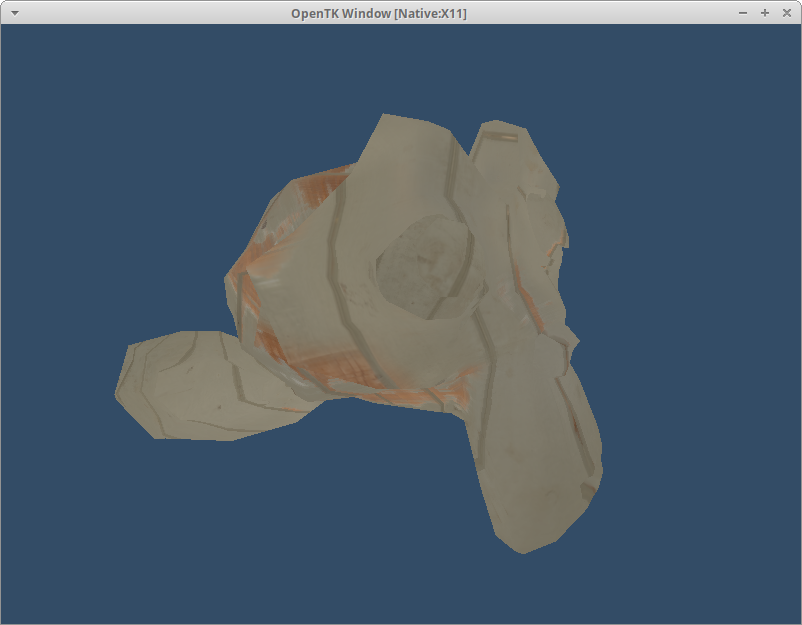
This rotating monkey called Suzanne is the goal we’re working towards throughout this entire series of tutorials. You can view the complete code at any time and I’d recommend taking some time to look through it now to see where all the files live. Take note of exactly what we’re looking at here too - a textured model spinning in 3D with no lighting or any other effects. Graphics programming can be incredibly rewarding and allows for seriously powerful effects but there’s a significant amount of work required to get there. Don’t give up hope now but make sure you’re prepared for a marathon and not a sprint.
Hello Window
Before we can get into the details of graphics programming we need to get started with a C# project. Lets begin by making a console app called LearnOpenTK in a folder of your choosing. Just in case you’ve forgotten we can do that in the command line with dotnet new console -n LearnOpenTK and once that completes check it runs with dotnet run. I’ll be using the command line a few more times but you can do all of this via the menus in Visual Studio. Assuming everyone has said hello to a world we’re ready to start integrating OpenTK.
If you’re using VSCode now is a good time to check you can run the project by pressing F5 as you might need to go through the task setup at the start. For Visual Studio it should “Just Work” after creating a new project but I’ve been doing this for so long I always check!
Lets review the code we have so far:
// See https://aka.ms/new-console-template for more information
Console.WriteLine("Hello, World!");
I’m not a huge fan of the new console style so we’ll convert to the regular class version. You can do this automatically by opening the action menu and selecting the convert option. If you can’t find it just replace the entire file with the following:
internal class Program
{
    private static void Main(string[] args)
    {
        Console.WriteLine("Hello, World!");
    }
}
Unlike the scary/insane C++ people we .net devs don’t have to worry too much about dependency management and get to use Nuget instead. We’ll add the OpenTK package to bring in all of the dependencies at once. Since we’re targeting 5.0 and it’s not fully released we need to target a specific version - there will probably be newer versions by the time you read this. We’ll be installing 5.0.0-pre.11 and this is the version the tutorials are written against but any newer 5.0 version should be fine. Make it all happen with dotnet add package OpenTK --version 5.0.0-pre.11 and check for a new reference in your LearnOpenTK.csproj. If you’re prompted to restore packages at this point choose yes.
Run the project again and discover that unfortunately this was not all the work needed to make a window appear. Unlike OpenTK 4 getting a window to display is a little more involved and does require changes. The usual approach in C# is to create a class for everything however OpenTK 5 takes a more direct approach to the underlying C API. Instead of creating a class for our window we’ll call the methods directly. This will feel a little weird at first but once you’ve used it a few times it should make a lot of sense.
Before we can use any of OpenTK 5 in our code we need to include it in with the typical using statements. We can start by adding just one at the top:
using OpenTK.Platform;
Now we can use the Toolkit static class which provides the core API of OpenTK 5. We’re here trying to make a new window and there’s a Window property - things are looking good! Inside the Window property there’s a Create method - are we done already? Not quite so fast as this method requires a GraphicsApiHints parameter. The tradeoff of supporting more than one implementation and multiple platforms is the need for up-front configuration.
If you were exploring this code for yourself you’d try to create the missing parameter by newing one up:
// don’t copy this!
GraphicsApiHints hints = new GraphicsApiHints();
Unfortunately you’d be hit with an error: “Cannot create an instance of the abstract type or interface 'GraphicsApiHints’”. We need to pick the OpenGL version but there are also ES and Vulkan versions. Create a new instance of OpenGLGraphicsApiHints and pass it to the Create method:
private static void Main(string[] args)
{
    OpenGLGraphicsApiHints hints = new OpenGLGraphicsApiHints();
    Toolkit.Window.Create(hints);
}
I’m sure everyone has already hit F5 to see what our new window looks like and unfortunately been greeted by a new runtime error: “You need to call Toolkit.Init() before you can use it.”. This is exactly what we need to do and thankfully only once so lets add Toolkit.Init(); before our existing code. Just like before we need to a little more configuration before we’re really ready to go. Init requires a ToolkitOptions parameter but unlike the hints class we can create this one directly.
private static void Main(string[] args)
{
    ToolkitOptions options = new ToolkitOptions();
    Toolkit.Init(options);

    OpenGLGraphicsApiHints hints = new OpenGLGraphicsApiHints();
    WindowHandle window = Toolkit.Window.Create(hints);
}
Run the project now and check there are no errors. If you’re on a pre-release version of 5 it’s possible there are issues that stop it from working. Try with earlier versions until you find one that works and if possible raise an issue! If the project runs and exits with no errors you’re good to move onto the next step.
Dude Where's My Window?
Everything runs but nothing is displayed before the program exits! There’s a few more things to configure and create namely our OpenGL context. The intricacies of OpenGL contexts are beyond this set of tutorials: all you need to know for now is one is required to do anything. Check out the OpenGL wiki to learn more about anything and everything OpenGL. Creating a context looks pretty similar to a window:
WindowHandle window = Toolkit.Window.Create(hints);
OpenGLContextHandle context = Toolkit.OpenGL.CreateFromWindow(window);
This time we’re using the OpenGL property of the toolkit as we’re doing OpenGL things. One of the details of a context is how they’re not active after creation - this is important for multi-threading but we’re sticking with a single thread. We’ll make our freshly created context active with Toolkit.OpenGL.SetCurrentContext. With our active context we need to do something unique to OpenTK and bind the context’s function pointers. This is the one bit where I will fully skip over why or how and just show the code.
Toolkit.OpenGL.SetCurrentContext(context);
OpenTK.Graphics.GLLoader.LoadBindings(Toolkit.OpenGL.GetBindingsContext(context));
Bindings locked and loaded! There’s just one line of code left before we can see this elusive window. We need to set the window mode to Normal. Here’s where we can really see the difference between a C# Object Orientated approach and the C style; we’re going to pass our window to a method on Toolkit.Window.
Toolkit.Window.SetMode(window, WindowMode.Normal);
You might be wondering why step is required - isn’t creating a window enough? This behaviour by design according to the Operating System (OS) and shared across all OpenGL ones (Windows, Linux, MacOS). Hidden windows are a really powerful tool and get used for a lot more than you might expect. Having every new window start hidden prevents them from flashing on screen for a moment. Speaking of flashing on screen for a moment that’s exactly what ours is doing!
We’re going to be creating and controlling the main loop ourselves. For those of you coming from OpenTK 4 this was handled for you by GameWindow. To keep things simple we’re going to use a basic loop, a very basic loop, possibly the most basic loop possible:
while (true)
{
    Toolkit.Window.ProcessEvents(false);
}
OpenTK gives us one responsibility: to process any OS messages given to us. Messages are how the OS communicates to programs and not doing so will cause trouble. Even if no messages are received it’s still required to check every loop and we do this with ProcessEvents. The choice when processing is if the main thread should wait or block until all messages are handled; we’re not going to wait but this is something you might need to experiment with so note it down.
Now when the project is run we finally get a permanent window. Unfortunately it’s a little bit too permanent and can’t be closed in any of the usual ways just by terminating the debugger. We’ll handle that next but for now let’s celebrate all of this hard work!
1 New Message
How we process events is another major change between OpenTK 4 and 5. We’ve seen the C style when adjusting the window settings and this carries through to how messages are processed. This is probably the most radical change between the two versions and is sure to raise some eyebrows. OpenTK 5 exposes these messages via an event queue and it’s up to us to decide how to process them.
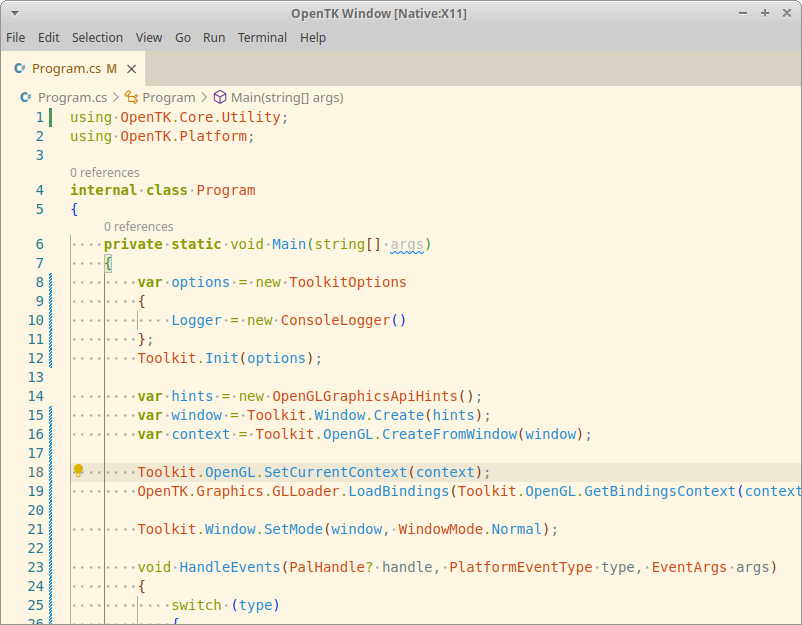
All of the ways we can interact with the message event queue are found on the EventQueue static class. The primary way is by using the .net events system which asks us to add a handler. We can see what this handler needs to look like by looking at the EventQueue.Raise method which results in the following method:
void HandleEvents(PalHandle? handle, PlatformEventType type, EventArgs args)
{
}
If you’re not familiar with local functions they were introduced in C# 7.0 so I don’t blame you! They provide an easy way to declare a function just to be used within another method which is exactly what we need for our event handler. With our handler in, er, hand we can register it with the event queue:
// setup code above here
Toolkit.Window.SetMode(window, WindowMode.Normal);

void HandleEvents(PalHandle? handle, PlatformEventType type, EventArgs args)
{
}

// make sure you use +=
EventQueue.EventRaised += HandleEvents;

while (true)
{
    // no changes here
    Toolkit.Window.ProcessEvents(false);
}
You can set a breakpoint inside this handler to get a feel for when events are fired and what sort of data comes with them. How many messages the window receives might surprise you. The one we’re interested in to begin with is CloseEventArgs which is issued when the OS wants to close our window. We could find this with an if but we will want to handle many more events in the future so we’ll go with a switch:
switch(args)
{
    case CloseEventArgs closeEvent:
        Toolkit.Window.Destroy(window);
        break;
}
Although this will destroy our window we don’t stop our main loop. We should check the window destroyed state each loop and exit the loop once it is destroyed:
while (true)
{
    Toolkit.Window.ProcessEvents(false);
    if(Toolkit.Window.IsWindowDestroyed(window)) break;
}
With this done all of the structural setup work is done. We’re now a well behaved application processing events and exiting when requested. If you stop processing messages you might get hit by the “Application Is Not Respoding” popup so it’s important to keep going even if nothing needs to change.
Recap
Congratulations for making it this far! You’ve made it through the most tedious part where all we got to show for it was an empty window. We’ve seen how OpenTK 5’s API looks and this should give you an idea of what to expect in the next chapter.
A lot of small but important things did get skipped in the rush to see a window. Have a look at the properties on ToolkitOptions and OpenGLGraphicsApiHints to see if you can change the window title or size.
If you’re stuck on any part you can check out the complete code or stop by the Open TK Discord. The subsequent tutorials all build on this base so make sure everything is working and you’re comfortable with how they fit together.
Continue with Chapter 1: Exactly One Triangle
Originally published on 2025/04/21