
OpenGL 2: Chapter Still Buffering
One triangle is good but what about a second triangle? Going from one to two in any part of programming can be a challenge and with OpenGL it’s possibly the hardest step to make. In this chapter we’ll cover another core concept of OpenGL to deal with lots of triangles.
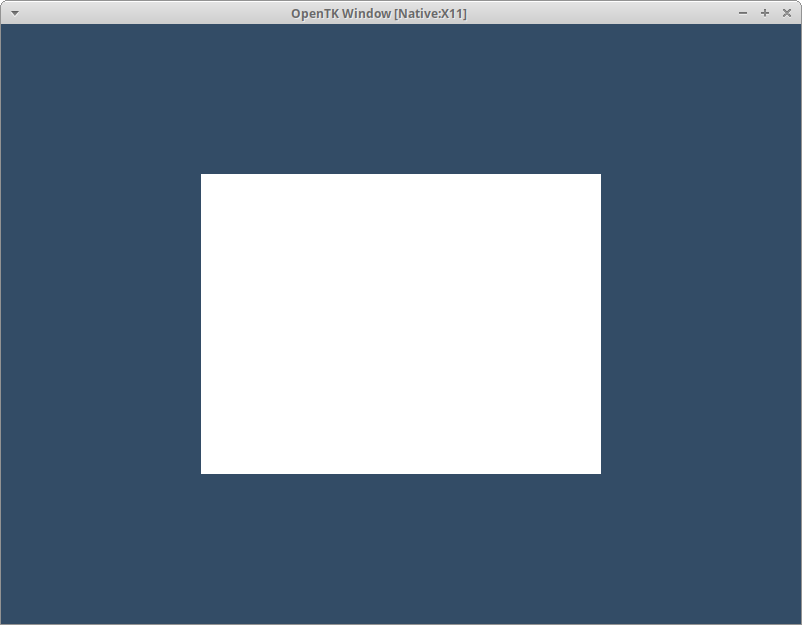
As usual we’ll check out the results first:
Completing Chapter 1.5 - Errors isn’t required to start this chapter but will help if things start to go wrong.
The Problem
Before we dive into slinging buffers left and right we should ask why do we need them in the first place? We’ve started by putting the vertex data for our triangle directly into our shader code. Now imagine we want to draw a quad, that’s a pair of triangles, how can we do it?
First lets define all the vertices for our quad. Like the triangle in the previous chapter we’ll be working in Normalized Device Co-Ordinates or NDC.
-0.5, -0.5, 0.0
+0.5, -0.5, 0.0
-0.5, +0.5, 0.0

+0.5, -0.5, 0.0
+0.5, +0.5, 0.0
-0.5, +0.5, 0.0
Can we put these directly into our shader? Yes we can! Try it out yourself and don’t forget you’ll need to ask OpenGL to draw 6 verticies.
Unfortunately this approach does not scale for two reasons. The first being how quickly the number of verticies required to represent something ramps up. Going from a triangle to quad we already doubled the verticies; to draw a full cube we need five times that. Secondly we will want to use multiple shaders as we go on and we’d have to include the data again and again each time.
Vertex Array Object
The eponymous Vertex Array Object, or VAO for short, has been part of OpenGL since version 1.1. Unfortunately being such a stalwart has allowed it to pick up a lot of baggage producing one of the most confusing concepts in OpenGL. The name suggests it’s a collection of vertexes and when it was introduced in 1995 this was the case. In the modern pipeline the VAO no longer holds data directly instead it holds references to other objects.
Creating a VAO, like we’ve seen with other OpenGL objects in Chapter 1, is straightforwards:
int vao = GL.GenVertexArray();
Remember we are always given handles to objects, their OpenGL Id, hence the int value coming back. Once we have a VAO we need to tell OpenGL we’re using it by binding it:
GL.BindVertexArray(vao);
As we’ll see in the next part we won’t be referencing the VAO handle directly. OpenGL only allows one VAO to be bound and all commands referencing it rely on this. This is one of the most confusing parts of OpenGL to learn and it’s very easy to end up in the wrong state.
Vertex Buffer Object
If the VAO doesn’t hold the vertex data what does? Stepping up is the Buffer Object; frequently used to store verticies it’s a mainstay object for holding data in OpenGL. When used in conjunction with the VAO they’re usually referred to as Vertex Buffer Objects or a VBO.
int vbo = GL.GenBuffer();
Our fresh faced buffer is ready to take on any job. We need to inform OpenGL that we’re going to be using it to store vertex data. Have a look through the other values on the BufferTarget enum; they’re capable of holding a lot more than just verticies. This is done by binding the buffer to a BufferTarget with the appropriately named GL.BindBuffer.
GL.BindBuffer(BufferTarget.ArrayBuffer, vbo);
You’d probably now assume that this binding is just done once and saved to the buffer object. Unfortunately you’d be completely wrong! There’s only a single ArrayBuffer active at any time with OpenGL and we’re swapping Buffer Objects in and out of it by changing the active VAO. This is part of the state retained by VAOs we mentioned in the previous section.
In order to fill our VBO with data we need some set up on the C# side. We’re going to use one of OpenTK’s types to represent our data: Vector3. Make sure when asked what include to use to pick OpenTK.Mathematics as there’s a version in System.Numerics. We’ll cover this difference in detail next chapter so for now create a new array with the same values we have in our shader code:
// after shader setup

Vector3[] verticies = [(-0.5f, -0.5f, 0.0f), (0.5f, -0.5f, 0.0f), (-0.5f, 0.5f, 0.0f),
    (0.5f, -0.5f, 0.0f), (0.5f, 0.5f, 0.0f), (-0.5f, 0.5f, 0.0f)];

// but before creating a vao
int vao = GL.GenVertexArray();
Connecting The Dots
We’ve covered a few things independently so lets recap the full setup code.
// setup code
Shader shader = new ();
shader.Setup();
GL.ClearColor(0.2f, 0.3f, 0.4f, 1.0f);

Vector3[] verticies = [(-0.5f, -0.5f, 0.0f), (0.5f, -0.5f, 0.0f), (-0.5f, 0.5f, 0.0f),
    (0.5f, -0.5f, 0.0f), (0.5f, 0.5f, 0.0f), (-0.5f, 0.5f, 0.0f)];

int vao = GL.GenVertexArray();
GL.BindVertexArray(vao);

int vbo = GL.GenBuffer();
GL.BindBuffer(BufferTarget.ArrayBuffer, vbo);

while (true) // etc
We’ve got an array of verticies, a VAO and a VBO. Remember it’s the VBO’s job to store data so the GPU can use, not the VAO, it so we’ll begin by telling it about our Vector3 array.
Performing this task is the sensibly named GL.BufferData and OpenTK gives us a number of overloads to choose from to best match our data. We’ve got a Vector3[] so we’ll be going with void GL.BufferData<T1>(BufferTarget target, nint size, T1[] data, BufferUsage usage) turning T1 into Vector3.
int vbo = GL.GenBuffer();
GL.BindBuffer(BufferTarget.ArrayBuffer, vbo);
GL.BufferData(BufferTarget.ArrayBuffer, verticies.Length * sizeof(float) * 3, verticies, BufferUsage.StaticDraw);
The target is our ArrayBuffer as expected but the size value is more than the array length - why is that? When we interface with the GPU we’re working with byte and bytes alone. Although the OpenTK bindings allow us to use C# types the data sent to the GPU is always sent as raw bytes. Our data is an array of Vector3 which in turn is made up of 3 floats and that’s the size we’re interested in. To calculate this we can use C#’s sizeof operator with the appropriate type parameter. We then need to multiply that by 3 since there are 3 floats per Vector. There’s no escaping the need to get down to bytes when interfacing with the GPU as it’s the only thing everyone understands. As you spend more time doing graphics programming you’ll become comfortable with handling low level data like this so don’t worry if it feels akward for now.
What we don’t see in the list is any reference to the VBO; by targeting the ArrayBuffer the state setup with BindBuffer ensures the correct link. This hidden state is one of the most confusing parts of OpenGL and easy to leave in the wrong place resulting in weird bugs. Unfortunately there’s no easy pancea to dealing with it and you’ll have to learn what functions require what state and handle the responsibility of creating it.
We’ve buffered the data onto the GPU but that’s only half the job. OpenGL doesn’t magically know the pile of floats we sent over make up verticies. It’s our job to explain the format of this array in a way OpenGL will understand. Right now this will feel a bit overkill as we only have verticies in our data but later on we’ll add more in and this groundwork will pay off.
This explanation work begins in the shader, before returning back to where we are now, so that’s where we head off to next!
Shader Input
We’re going to be working on the vertex shader in this section so that’s where to put all of the upcoming code. Here’s the full shader program code again in case you’ve made too many changes:
// Shader.cs
    string vertex = @"
#version 330

vec3 verticies[3] = vec3[3](vec3(-0.5, -0.5, 0.0), vec3(0.5, -0.5, 0.0), vec3(0.0, 0.5, 0.0));

void main ()
{
    gl_Position = vec4(verticies[gl_VertexID], 1.0);
}"

    string fragment = @"
#version 330

out vec4 fragColor;

void main ()
{
    fragColor = vec4(1.0);
}"
The goal is to read our vertex data from the VAO so we can start by removing our hardcoded array of verticies. Delete the entire vec3 verticies[3]… line! In its place we’re going to use an Input value with the in keyword:
#version 330

in vec3 position;

void main ()
{
    gl_Position = vec4(position, 1.0);
}
Don’t foget to change gl_Position to use our shiny new input value in place of reading the verticies array. If we ran our project now we’d be back to viewing an empty window. Before we continue lets take a brief look at the input declaration to see how it works.
At the front of our declaration is the in keyword which does the heavy lifting to tell OpenGL this value comes from the VAO. There’s a matching out keyword for sending data from one stage to another; gl_Position is declared this way for us. A third uniform keyword exists too which we’ll look at later on.
Next we’re declaring the value to be vec3 which is the GLSL version of our C# Vector3. Just a moment ago we said everything goes to the GPU as bytes but here we’re using a fancier type what gives? The input is just a sequence of bytes but we can choose how to interperate them in the Shader however we like. It’s up to us to match the two types together but there’s a lot of power available mixing and matching the way we fill then read from the VAO.
Before we wrap up working with our shader code we’re going to need the shaderHandle later on outside of our Shader class so lets make it a property. I’ll be storing it in a private field and exposing it with a public property.
// Shader.cs

int id;

// at the end of Setup()
id = shaderHandle;

// a brand new property
public int Id => id;
Giant Strides
With our shader now updated and expecting a vec3 we head back to our VAO to finish the fight. To do this we’re going to be configuring the Vertex Attributes on our Vertex Array Object.
A common question is why are they called attributes here and inputs in the shader? Shader inputs can happen at any stage and cover more than just data from the VAO. It’s only the inputs to the Vertex Shader that come from Vertex Attributes but you’ll frequently hear both terms used to describe the setup work on either side. Lets start with the entire code and break it down as we go:
uint position = (uint)GL.GetAttribLocation(shader.Id, "position");
GL.EnableVertexAttribArray(position);
GL.VertexAttribPointer(position, 3, VertexAttribPointerType.Float, false, sizeof(float) * 3, 0);
This relationship between vertex attribute and shader input is controlled by the index. Every input to the shader from the VAO is given a unique index but it’s not quite as simple as 1, 2, 3. For now we’ll just ask OpenGL for the index of our position input. Thankfully there’s a method to do just that GL.GetAttribLocation which needs our shader’s Id and the name of our attribute. In classic C fashion this returns -1 if the attribute wasn’t found on the shader specified and we’re just going to ignore the possibility of that by casting directly to an unsigned int aka uint.
With the possition attribute location found we first need to tell OpenGL this data is coming from the vertex array. There’s a function specifically for this GL.EnableVertexAttribArray, try saying that one three times fast, which takes the location we just obtained. The argument asks for a uint which is why we went to the trouble of casting just now. Once enabled we can move on to the most important line.
Remember when we filled our vertex array it was with a series of Vector3 values and in the shader we want to read it out as vec3? This line is where our worlds collide and we finally explain that relationship by describing the stride of the VAO. The stride explains how to move through the array for every step of the DrawArrays and slots into place the exact data that will fill out our vertex input.
Lets walk through each argument and see how the magic happens. We start with uint index which is our attribute index we just spend so much time configuring. After this comes a int size which is the OpenGL size of the bite to take with every step which is tightly paired to the VertexAttribPointerType type argument. This type tells OpenGL what to read out from the byte array that makes up our VAO; typically it’ll be float but you can look at VertexAttribPointerType to see all the different types OpenGL can handle - then forget them as you’ll use float 99% of the time! Next up is bool normalized which allows the use of Normalized Integers. We’re not using these so an easy false and we can move on to the final pair.
int stride and nint offset go together just like size and type did. These tell OpenGL how big a step to take when walking through our array. In our current VAO we only have the vertex position data so this feels like a lot of work but as soon as we get into textures in Chapter 4 the full power of this will be unlocked. The size is the C# size so we’re using sizeof(float) * 3 just like we did buffering the data originally. Our vertex data is the only data in the array so we start reading it at the begining with an offset of 0. Like the stride the full power of offset will be unlocked later on.
Finally update our draw call to always match how many verticies we have:
GL.DrawArrays(PrimitiveType.Triangles, 0, verticies.Length);
Run your project again and with a little luck you can finally bask in the glory that is our Quad!
Stridebuilder
Reasoning about stride and offset values can be quite tricky when you’re just getting started. To help with it I’ve made a little interactive tool called Stridebuilder that visually represents the data going into the array. You can add or remove data on the C# side at the top then build matching Vertex Attributes at the bottom.
Try building our current VAO and work out the correct attribute values. In Chapter 4 we’ll be expanding our VAO with some new data. Try adding another Vector3 to give each vertex a unique color in the tool then replicate that in your own code.
You can use it as a standalone tool as well.
Recap
Another mega chunk of concepts and terms to understand! Luckily if you’ve made it this far you’ve cleared the biggest hurdle when learning OpenGL. Buffers are the principle way of sending data to the GPU and with them unlocked you can start to piece together how a complete application might look.
There’s not many ways to experiment with our new code as we’ve still hardcoded our vertex array. Any change you make from here is almost certain to break the draw call and end up showing nothing so be sure to check out Chapter 1.5 if you can’t work out what went wrong.
It’s certainly worth going through this chapter a few times to try and understand how VAOs, VBOs and Vertex Attributes work as they’re fundamental to rest of the series.
Continue with Chapter 3: The Matrix
Originally published on 2025/04/24